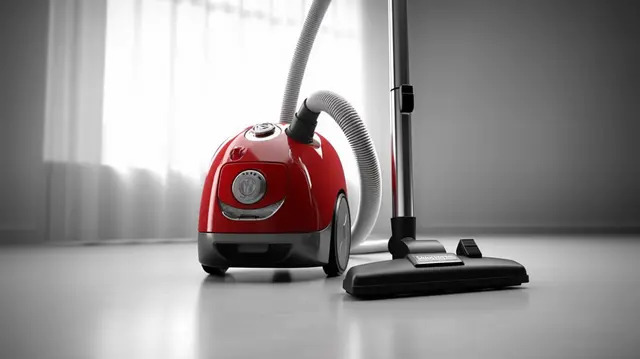
Let’s be real for a moment. Your vacuum cleaner is the unsung hero of your home, battling dust bunnies, pet hair, and that trail of cracker crumbs the kids left behind. But have you ever stopped to think about what’s really going on inside that machine? It’s a dark, dirty world in there. Knowing How To Sanitize Vacuum Cleaner parts isn’t just about getting rid of a funky smell; it’s about protecting your home’s air quality and ensuring your machine runs at peak performance for years to come. Did you know the average home collects about 40 pounds of dust per year? Your vacuum is on the front lines, and it needs a deep clean of its own.
Why You Absolutely Must Sanitize Your Vacuum Cleaner
Think of your vacuum as more than just a dirt collector. It’s an air-circulating machine. As it sucks up dirt, it also pulls in microscopic hitchhikers like bacteria, mold spores, dust mite allergens, and pet dander. If the internal components—especially the filters—are clogged and dirty, your vacuum can actually start spewing these contaminants back into the air you breathe. Gross, right?
Sanitizing your vacuum regularly offers three massive benefits:
- Better Air Quality: A clean machine with a fresh filter traps allergens instead of recirculating them. This is a game-changer for anyone with allergies or asthma.
- Improved Performance: When filters, hoses, and brush rolls are clean, airflow is unrestricted. This directly translates to stronger suction power, meaning you pick up more dirt in fewer passes.
- Longer Lifespan: Just like changing the oil in your car, regular maintenance prevents strain on the motor and other critical parts, saving you from costly repairs or replacements down the line.
Before You Start: Gathering Your Sanitizing Toolkit
Before you dive in, let’s get our gear in order. You don’t need a professional lab, just a few household staples. Having everything ready makes the process smooth and quick.
- Safety First: Rubber gloves to keep your hands clean.
- Cleaning Crew: Microfiber cloths, an old toothbrush or small cleaning brush, and scissors or a seam ripper (you’ll see why).
- The Solutions: A bucket with warm water and a few drops of mild dish soap. A disinfecting solution is also key; you can use a commercial disinfectant spray or a simple mixture of equal parts white vinegar and water in a spray bottle.
- Workspace: Lay down some old newspapers or a towel to catch any dust and debris.
And the most important step of all? Always, always, always unplug your vacuum cleaner from the wall before starting any maintenance! Safety isn’t just a suggestion; it’s a necessity.
A Step-by-Step Guide on How to Sanitize Vacuum Cleaner Components
Alright, gloves on? Let’s dismantle this beast and give it the spa day it deserves. We’ll tackle it one component at a time.
Step 1: The Dustbin or Bag – Ground Zero for Grime
This is where the bulk of the dirt lives. How you handle it depends on whether you have a bagless or bagged model.
- For Bagless Vacuums: Empty the canister into a trash bag, preferably outdoors to prevent dust from flying everywhere. Take the canister to your sink, and if the manufacturer’s instructions permit, wash it thoroughly with warm, soapy water. Use your old toothbrush to scrub away any stubborn, caked-on grime. Before you reassemble, it is crucially important that the canister is 100% dry. Any moisture can lead to mold growth and can damage the motor.
- For Bagged Vacuums: Simply remove the full bag and dispose of it. Don’t try to reuse it! Take a damp microfiber cloth and wipe down the inside of the bag compartment to remove any residual dust.
Step 2: The Filters – Your Vacuum’s Lungs
The filters are arguably the most important part to clean for both air quality and suction power. Most vacuums have at least two: a pre-motor filter and a post-motor filter (often a HEPA filter).
- Locate and Remove: Consult your user manual to find your filters. They’re usually easy to access behind a clip or panel.
- Check if Washable: Some filters, typically foam or felt ones, are washable. If so, rinse them under cool water until the water runs clear. Gently squeeze out excess water—never wring them, as this can damage the filter’s structure.
- Let Them Air Dry Completely: Just like the dustbin, filters must be completely dry before being reinstalled. This can take 24-48 hours. Putting a damp filter back in can lead to mildew and restrict airflow.
- Know When to Replace: HEPA filters and cartridge-style filters are often not washable. Tapping them gently against the side of a trash can can dislodge some dust, but they have a finite lifespan. Check your manual, but a good rule of thumb is to replace them every 6-12 months, or sooner if you notice a drop in performance or a persistent musty smell.
“A clogged filter is the number one cause of reduced suction. People often think their vacuum motor is failing when, in reality, they just need a $15 filter replacement. It’s the simplest fix with the biggest impact.” – David Chen, Product Engineer.
Step 3: The Brush Roll (Beater Bar) – The Hair Magnet
If you have pets or long-haired family members, this part will look terrifying. I once pulled a whole civilization of pet hair, string, and who-knows-what-else from my brush roll. It was both disgusting and deeply satisfying.
- Remove the Brush Roll: You may need a screwdriver to remove the bottom plate to access it.
- Cut Away Debris: Use scissors or a seam ripper to carefully snip through all the tangled hair and fibers. Be careful not to cut the bristles themselves.
- Pull and Clean: Once cut, the hair should pull away easily. Use your brush or a cloth to clean the bristles and the housing area.
- Disinfect: Lightly spray the bristles with your disinfectant solution and wipe them down. Ensure it’s dry before reassembling. A clean brush roll spins freely and agitates carpets much more effectively.
Step 4: Hoses and Attachments – The Hidden Tunnels
Don’t forget the accessories! Gunk can build up in the hose and crevice tools, causing blockages and nasty odors.
- Hose Check: Detach the hose and drop a small, heavy object like a coin or marble through it. If it doesn’t come out the other side, you have a clog. You can often dislodge it using a broom handle or by flexing and massaging the hose.
- Wash Attachments: Soak your plastic attachments (crevice tool, upholstery brush, etc.) in warm, soapy water. Use a brush to clean them out, then rinse and let them air dry completely.
|
Our Picks for the Best Vacuum Cleaner in 2026
As an Amazon Associate, we earn from qualifying purchases.
|
||
| Num | Product | Action |
|---|---|---|
| 1 | Shark | Pet Cordless Vacuum Cleaner | LED Headlights | Removable Handheld Vacuum for Pet Hair | Crevice Tool & Pet Multi-Tool Included | 40min Runtime | For Carpet & Hard Floors | Grey | IX141 |

|
| 2 | LEVOIT Cordless Vacuum Cleaner, Stick Vac with Tangle-Resistant Design, Up to 50 Minutes, Powerful Suction, Rechargeable, Lightweight, and Versatile for Carpet, Hard Floor, Pet Hair, LVAC-200 |
|
| 3 | Shark HV322 Rocket Deluxe Pro Corded Stick Vacuum with LED Headlights, XL Dust Cup, Lightweight, Perfect for Pet Hair Pickup, Converts to a Hand Vacuum, with Pet Attachments, Bordeaux/Silver |
|
| 4 | Amazon Basics Upright Bagless Vacuum Cleaner for Carpet and Hard Floors, With Crevice and Upholstery Tools, Detachable Handle, Lightweight (8.4 lbs), 1.7L Dust Cup, 720W, 25ft Cord, Black/White |
|
| 5 | BLACK+DECKER dustbuster AdvancedClean Cordless Handheld Vacuum, Compact Home and Car Vacuum with Crevice Tool (CHV1410L) |
|
| 6 | Shark NV352 Navigator Lift Away Upright Vacuum, Hepa Filter, Anti-Allergen Technology, Swivel Steering, Ideal for Carpet, Stairs, & Bare Floors, with Wide Upholstery & Crevice Tools, Lavender |
|
| 7 | BLACK+DECKER dustbuster QuickClean Cordless Handheld Vacuum, Car Vacuum Portable (HNVC215B10) |
|
| 8 | BISSELL CleanView Compact Turbo Upright Vacuum with Quick Release Wand, Full Size Power, Compact Size for Apartments & Dorms, 3437F |
|
| 9 | BISSELL CleanView Compact Upright Vacuum, Fits in Dorm Rooms & Apartments, Lightweight with Powerful Suction and Removable Extension Wand, 3508 |
|
| 10 | Shark | Upright Vacuum Cleaner | Navigator Lift-Away | Swivel Steering | HEPA Filter | Vacuum for Pet Hair | Crevice Tool & Dusting Brush Included | For Carpets & Hard Floors | White/Silver | NV356E |
|
Step 5: The Exterior – The Final Polish
Finally, give the outside of your vacuum a good wipe-down with a cloth spritzed with your disinfectant. Pay attention to the handle, wheels, and power cord. This removes surface germs and leaves your machine looking brand new.
How Often Should You Sanitize Your Vacuum?
For the average household, a full sanitization every 3 to 6 months is a great goal. However, you should adjust based on your usage. If you have pets, family members with allergies, or a busy household, cleaning it every 1 to 2 months is a better idea.
Frequently Asked Questions About Sanitizing Vacuums
Can I use bleach to sanitize my vacuum cleaner?
No, it’s not recommended. Bleach can be too harsh for the plastic components of your vacuum, causing them to become brittle and crack over time. A solution of vinegar and water or a mild commercial disinfectant is a much safer choice.
What’s the difference between cleaning and sanitizing a vacuum?
Cleaning is the act of removing visible dirt and debris, like emptying the canister and cutting hair from the brush roll. Sanitizing goes a step further by using a disinfecting agent to kill germs, bacteria, and mold spores on the vacuum’s surfaces and components.
My vacuum still smells after cleaning, what should I do?
A persistent odor usually points to a dirty filter that needs replacing or a hidden clog in the hose. If you’ve addressed both, try placing a few cotton balls soaked in essential oil (like lemon or lavender) inside the dry dustbin before your next use.
How do I sanitize a robot vacuum cleaner?
The process is very similar! Unplug it from its dock, empty the dustbin, wash it if possible, wipe down the sensors and exterior with a disinfectant cloth, and clean the small brush rolls and filters just as you would with an upright or cordless model.
Is it safe to wash a HEPA filter?
Most of the time, no. True HEPA filters are made of a dense web of fine fibers that can be damaged by water, ruining their ability to trap microscopic particles. Always check your manual; if it doesn’t explicitly say “washable,” assume it’s replaceable only.
A Healthier Home Starts with a Cleaner Vacuum
There you have it—a complete blueprint for transforming your hardworking vacuum from a grime-filled machine into a lean, clean, sanitizing powerhouse. Taking 30 minutes every few months to follow these steps does more than just get rid of bad smells; it enhances your vacuum’s suction power, extends its life, and contributes to a healthier living environment for you and your family. Mastering how to sanitize vacuum cleaner parts is a simple yet powerful step toward a cleaner home. Now go on, give your vacuum the TLC it deserves! We’d love to hear about your experience in the comments below.