Achieving a truly clean home with a vacuum cleaner involves a systematic approach, starting with preparation, followed by methodical vacuuming, and concluding with essential machine maintenance. This process ensures not only visibly clean floors but also improved air quality by trapping allergens and extending the lifespan of your flooring. For instance, a typical home can accumulate up to 40 pounds of dust annually, much of which settles into carpets and crevices, making a proper vacuuming routine crucial.
Before you even think about starting your engine, a little preparation goes a long way. This isn’t just about making the job easier; it’s about making it more effective. For those struggling with specific challenges, understanding how to vacuum pet hair properly can be a major upgrade, and many of the principles start right here with good prep.
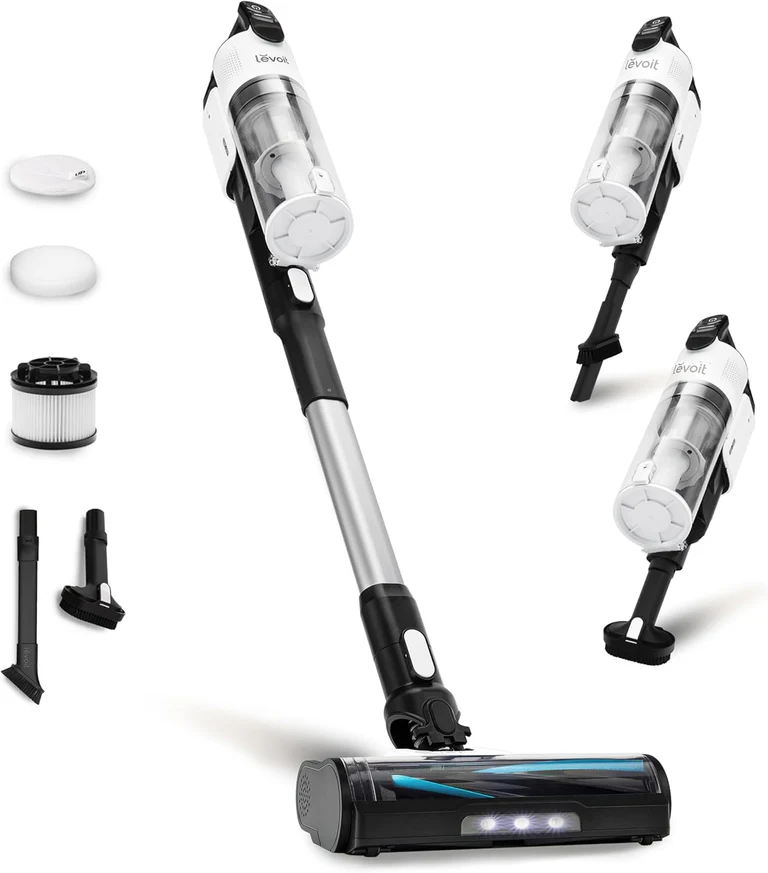 For explore our vacuum cleaner reviews on this site.
Before You Plug It In: The Art of Preparation
You wouldn’t paint a wall without prepping it first, right? The same logic applies to vacuuming. Skipping these pre-cleaning steps is like trying to run a marathon with your shoes untied.
- Declutter the Battlefield: Pick up toys, shoes, magazines, and any other floor clutter. This not only prevents you from accidentally sucking up a stray Lego but also gives you a clear, unobstructed path to clean.
- Work from Top to Bottom: Dust always settles downwards. So, before you vacuum, dust your ceiling fans, light fixtures, shelves, and tabletops. Use a microfiber cloth to wipe down surfaces. This ensures that any dust you knock onto the floor will be picked up by the vacuum, making it the final, decisive step in your cleaning attack.
- Choose Your Weapon (Attachment): Modern vacuums come with a whole arsenal of tools. Don’t ignore them!
- Crevice Tool: Your best friend for tight corners, along baseboards, and in between sofa cushions.
- Dusting Brush: Has soft bristles perfect for delicate surfaces like lampshades, blinds, and keyboards.
- Upholstery Tool: A wide-based tool, often with a fabric strip, designed to pull dust and pet hair from sofas and chairs.
- Motorized Brush Head: The main attachment, designed for large floor areas. Many have adjustable heights for different carpet piles.
The Main Event: Step by Step Cleaning with Vacuum Cleaner
Alright, the stage is set. Now it’s time for the main performance. Following a systematic approach ensures you don’t miss a spot and get the deepest clean possible.
- Start from the Farthest Point: Begin in the corner of the room that is farthest from the door. This way, you can work your way out of the room without stepping on the areas you’ve just cleaned. It’s a simple trick, but it makes a world of difference.
- The “Mowing the Lawn” Pattern: Don’t just haphazardly push the vacuum back and forth. Work in straight, overlapping rows, much like mowing a lawn. This methodical pattern guarantees complete coverage. For high-traffic areas, go over them twice, once in each direction (e.g., north-to-south, then east-to-west), to agitate and lift dirt from deep within the carpet fibers.
- Slow and Steady Wins the Race: Rushing through the job is one of the biggest mistakes people make. Your vacuum’s brush roll and suction power need time to work their magic. A slower pass allows the brush to agitate the carpet fibers and the suction to pull up the dislodged dirt, dust, and pet hair.
- Tackle the Edges First (or Last): Use the crevice tool to do a full lap around the room’s perimeter, getting right up against the baseboards where dust bunnies love to congregate. You can do this either before you start on the main floor or after, but don’t skip it!
- Listen to Your Machine: Pay attention to the sound of your vacuum. You can often hear when it’s picking up a lot of debris (like after spilling some cereal). If the sound changes suddenly or the machine feels harder to push, it might be a sign the bag or canister is full, or there’s a clog.
Beyond the Basics: Adapting Your Technique for Different Surfaces
Not all floors are created equal. A great vacuuming technique involves adapting to the surface you’re cleaning. What works for a plush carpet could be too aggressive for a vintage hardwood floor.
Hardwood, Laminate, and Tile Floors
|
Our Picks for the Best Vacuum Cleaner in 2026
As an Amazon Associate, we earn from qualifying purchases.
|
||
| Num | Product | Action |
|---|---|---|
| 1 | LEVOIT Cordless Vacuum Cleaner, Stick Vac with Tangle-Resistant Design, Up to 50 Minutes, Powerful Suction, Rechargeable, Lightweight, and Versatile for Carpet, Hard Floor, Pet Hair, LVAC-200 |

|
| 2 | BISSELL CleanView Compact Upright Vacuum, Fits in Dorm Rooms & Apartments, Lightweight with Powerful Suction and Removable Extension Wand, 3508 |
|
| 3 | BISSELL CleanView Compact Turbo Upright Vacuum with Quick Release Wand, Full Size Power, Compact Size for Apartments & Dorms, 3437F |
|
| 4 | Amazon Basics Upright Bagless Vacuum Cleaner for Carpet and Hard Floors, With Crevice and Upholstery Tools, Detachable Handle, Lightweight (8.4 lbs), 1.7L Dust Cup, 720W, 25ft Cord, Black/White |
|
| 5 | Shark | Pet Cordless Vacuum Cleaner | LED Headlights | Removable Handheld Vacuum for Pet Hair | Crevice Tool & Pet Multi-Tool Included | 40min Runtime | For Carpet & Hard Floors | Grey | IX141 |
|
| 6 | BLACK+DECKER dustbuster QuickClean Cordless Handheld Vacuum, Car Vacuum Portable (HNVC215B10) |
|
| 7 | Shark NV352 Navigator Lift Away Upright Vacuum, Hepa Filter, Anti-Allergen Technology, Swivel Steering, Ideal for Carpet, Stairs, & Bare Floors, with Wide Upholstery & Crevice Tools, Lavender |
|
| 8 | BLACK+DECKER dustbuster AdvancedClean Cordless Handheld Vacuum, Compact Home and Car Vacuum with Crevice Tool (CHV1410L) |
|
| 9 | Shark HV322 Rocket Deluxe Pro Corded Stick Vacuum with LED Headlights, XL Dust Cup, Lightweight, Perfect for Pet Hair Pickup, Converts to a Hand Vacuum, with Pet Attachments, Bordeaux/Silver |
|
| 10 | Shark | Upright Vacuum Cleaner | Navigator Lift-Away | Swivel Steering | HEPA Filter | Vacuum for Pet Hair | Crevice Tool & Dusting Brush Included | For Carpets & Hard Floors | White/Silver | NV356E |
|
For hard surfaces, you want to avoid scratching. If your vacuum has a beater bar (the rotating brush), make sure you can turn it off. A spinning brush can scatter debris on hard floors and potentially cause fine scratches over time. Use a hard floor head attachment if you have one—they typically have soft bristles. The key here is strong suction to lift dust from the cracks between floorboards.
Low-Pile vs. High-Pile Carpets
This is where your vacuum’s height adjustment settings come into play.
- Low-Pile Carpets: A lower setting allows the brush to get close to the base of the carpet to effectively pull out dirt.
- High-Pile or Shag Carpets: You’ll need a higher setting. If it’s too low, you’ll create too much drag, making it hard to push and potentially damaging the long carpet fibers. A powerful cordless vacuum can be great here, as you won’t have to wrestle with a cord around furniture.
“The biggest factor in maintaining carpet life is not the cleaning solution you use, but the frequency and quality of your vacuuming,” notes Dr. Alistair Finch, a specialist in household environmental science. “A good vacuum with a HEPA filter doesn’t just remove dirt; it removes microscopic allergens, improving your home’s air quality.”
What Happens After the Power Goes Off?
Your job isn’t quite done when the floor is clean. A little post-cleaning maintenance ensures your vacuum is ready for the next battle and keeps it running efficiently for years.
- Empty the Canister or Bag: A full canister or bag severely restricts airflow, which is the secret to powerful suction. Don’t wait until it’s completely stuffed. A good rule of thumb is to empty your bagless canister when it’s two-thirds full. For bagged models, replace the bag when it’s about two-thirds full as well.
- Check and Clean Your Filters: Clogged filters are the number one cause of poor performance. Most vacuums have at least one or two filters (pre-motor and post-motor/HEPA). Check your manual—many are washable with water, but they must be completely dry before you put them back in. Poor maintenance is a primary reason for performance issues. In fact, a gradual decline in performance is very similar to what happens when you need to understand how to fix vacuum cleaner no suction, as a clogged filter is often the main culprit.
- Inspect the Brush Roll: After vacuuming, turn the machine over and check the brush roll. Hair, thread, and strings love to get wrapped around it. Carefully cut them away with scissors to keep the brush spinning freely.
- Store It Properly: Don’t just shove your vacuum in a closet. Wind the cord loosely to avoid damaging the internal wires. Proper storage is key to longevity, preventing issues that might lead you to search for how to fix vacuum cleaner not turning on down the road.
How Often Should You Really Be Vacuuming?
For optimal cleanliness, vacuum high-traffic areas like entryways and kitchens at least twice a week, and the entire house once a week. If you have pets or family members with allergies, daily vacuuming may be necessary to control dander and allergens effectively.
Frequently Asked Questions
What’s the best pattern for vacuuming a room?
The best pattern for vacuuming a room is to work in straight, overlapping rows, similar to mowing a lawn. For heavily soiled or high-traffic areas, vacuum the area twice, once horizontally and then again vertically, to effectively lift dirt from all angles of the carpet pile.
Should I dust before or after vacuuming?
Always dust before you vacuum. Dusting dislodges particles from higher surfaces, causing them to settle on the floor. Vacuuming afterwards ensures you pick up all that settled dust for a comprehensively clean room, preventing it from recirculating.
How do I know if my vacuum canister or bag is full?
Most bagless vacuums feature a clear canister with a “max fill” line, indicating when it needs emptying. For bagged vacuums, a noticeable drop in suction power is a key indicator, and some advanced models also include an indicator light to signal a full bag.
Why does my vacuum cleaner smell bad when I use it?
A bad smell from your vacuum cleaner is typically caused by old pet hair, mold, or bacteria accumulating inside the bag, canister, or on the filter. To resolve this, empty the canister after every use, change bags regularly, and wash your filters according to the manufacturer’s instructions.
Can you vacuum too much?
For most modern carpets and hard floors, it is very difficult to vacuum too much. Frequent vacuuming is beneficial for carpets as it removes abrasive dirt particles that can wear down fibers over time, extending their life. Just ensure you use the correct height setting for your specific carpet type.
The Final Pass
Mastering the step by step cleaning with vacuum cleaner method is about working smarter, not harder. By preparing your space, using a methodical technique, and performing simple maintenance, you’ll achieve a deeper, longer-lasting clean. Your floors will look better, your home’s air quality will improve, and your trusty vacuum will thank you with years of reliable service. Now, go forth and conquer that dust! We’d love to hear about your own vacuuming tips and tricks in the comments below.
Get our weekly buyer guide
Practical specs, not advice. Unsubscribe anytime.
As someone who struggles with pet hair, the mention of understanding how to vacuum it properly really resonated. While the post focused on general prep, it highlighted that specific challenges like pet hair benefit from a good foundation. I’ve started implementing the ‘before you plug it in’ steps, and it’s already making my pet hair removal much more effective. My home feels cleaner and less dusty.
The advice on methodical vacuuming, especially overlapping passes, has really improved how clean my carpets feel. I used to just zip around, but taking my time and doing it systematically actually gets more dirt up. I appreciate the focus on extending the lifespan of flooring too; that’s something I hadn’t really considered before. Good practical tips.
I always thought I knew how to vacuum, but the tip about preparing the area first really made a difference. Moving small items and picking up larger debris before starting saved me so much time and made the vacuuming itself more efficient. My floors look so much better, and I’m not constantly stopping to clear something from the brush roll. Definitely a game-changer for my routine!
I found the section on trapping allergens helpful, as I have pretty bad allergies. However, I wish there was a bit more detail on specific vacuum types that are best for this, beyond just the general cleaning steps. My current vacuum doesn’t seem to make a huge difference, even with these tips. Still, the preparation advice was solid.