Let’s be honest, when was the last time you gave your vacuum’s wands and brushes a second thought? We spend so much time worrying about the main unit—the canister, the filter, the bag—that the very tools doing the frontline work get completely ignored. If you’ve ever wondered why your trusty machine suddenly lacks its old suction power, the answer might be hiding in plain sight. Learning How To Clean Vacuum Cleaner Attachments is one of those simple, game-changing maintenance tasks that separates a good cleaning routine from a great one. It’s the secret to unlocking your vacuum’s peak performance and ensuring it lasts for years to come.
Think of your vacuum cleaner as an athlete. The motor is the heart, but the attachments are the hands and feet. If they’re caked in dirt, tangled with hair, and clogged with debris, how can you expect them to perform at their best? A dirty attachment doesn’t just look gross; it actively restricts airflow, which is the very essence of how a vacuum works. This forces the motor to work harder, reduces its lifespan, and, worst of all, leaves dirt behind on your floors.
Why Cleaning Your Vacuum Attachments is a Non-Negotiable Chore
Skipping this task is like trying to wash your dishes with a dirty sponge—you’re just moving the mess around. Neglected attachments can become breeding grounds for bacteria and allergens, which then get blown back into your air the next time you clean. Yikes.
Here’s the breakdown of why this 15-minute job is so crucial:
- Restores Peak Suction Power: The number one reason for a drop in performance is a blockage. Often, that blockage isn’t in the main hose but right at the point of contact: the attachment head. A clear pathway means maximum airflow and powerful suction.
- Improves Hygiene and Air Quality: Attachments pick up everything from pet dander and dust mites to food crumbs and outdoor grime. Cleaning them removes these trapped allergens and prevents musty odors from developing inside your machine.
- Extends the Life of Your Vacuum: When airflow is restricted, your vacuum’s motor has to overcompensate, leading to overheating and premature wear and tear. A clean machine is a happy, long-lasting machine.
- Achieves a Better Clean: A clean dusting brush picks up dust instead of smearing it. A tangle-free turbo brush agitates carpet fibers properly to lift deep-seated dirt. You get the picture.
To ensure you’re getting the most out of your machine for every type of mess, it’s worth understanding the fundamentals. For those dealing with furry friends, the challenge is unique. To truly master the art of a fur-free home, exploring how to vacuum pet hair properly can provide insights that complement a well-maintained toolset.
Getting Started: Your Cleaning Toolkit
You don’t need a professional workshop to get this done. Most of what you need is likely already under your kitchen sink.
- Warm water
- Mild dish soap or vinegar
- A sink, bucket, or large basin
- An old toothbrush or a small cleaning brush
- Scissors or a seam ripper (essential for tangled brush rolls)
- A microfiber cloth
- A can of compressed air (optional, but very helpful)
A Step-by-Step Guide on How to Clean Vacuum Cleaner Attachments
Before you begin, always unplug your vacuum cleaner from the wall. If you have a cordless model, remove the battery pack. Safety first!
Cleaning Basic Attachments (Crevice Tool, Dusting Brush, Upholstery Tool)
These are the easiest to clean as they have no moving parts. They are typically just molded plastic and bristles.
- Disassemble and Inspect: Detach the tool from the vacuum wand. Give it a good tap over a trash can to dislodge any loose debris.
- Dry Clean First: Use your fingers or a dry brush to pull out any clumps of hair and lint from the bristles of the dusting or upholstery tool. For the crevice tool, a quick blast of compressed air or a pipe cleaner can push out stubborn debris from the narrow end.
- Give Them a Bath: Fill a sink or basin with warm water and a few drops of mild dish soap. Submerge the attachments and let them soak for about 10-15 minutes. This will help dissolve any caked-on grime.
- Scrub Gently: Use an old toothbrush to gently scrub the tools, paying close attention to the bristles on the dusting brush and the fabric strip on the upholstery tool. Get into all the nooks and crannies of the crevice tool.
- Rinse and Dry Thoroughly: Rinse each attachment under clean, running water until all the soap is gone. Shake off any excess water and then lay them on a towel to air dry completely. This is the most important step! They must be 100% dry before you reattach them to the vacuum to prevent mold, mildew, or electrical damage. Allow at least 24 hours.
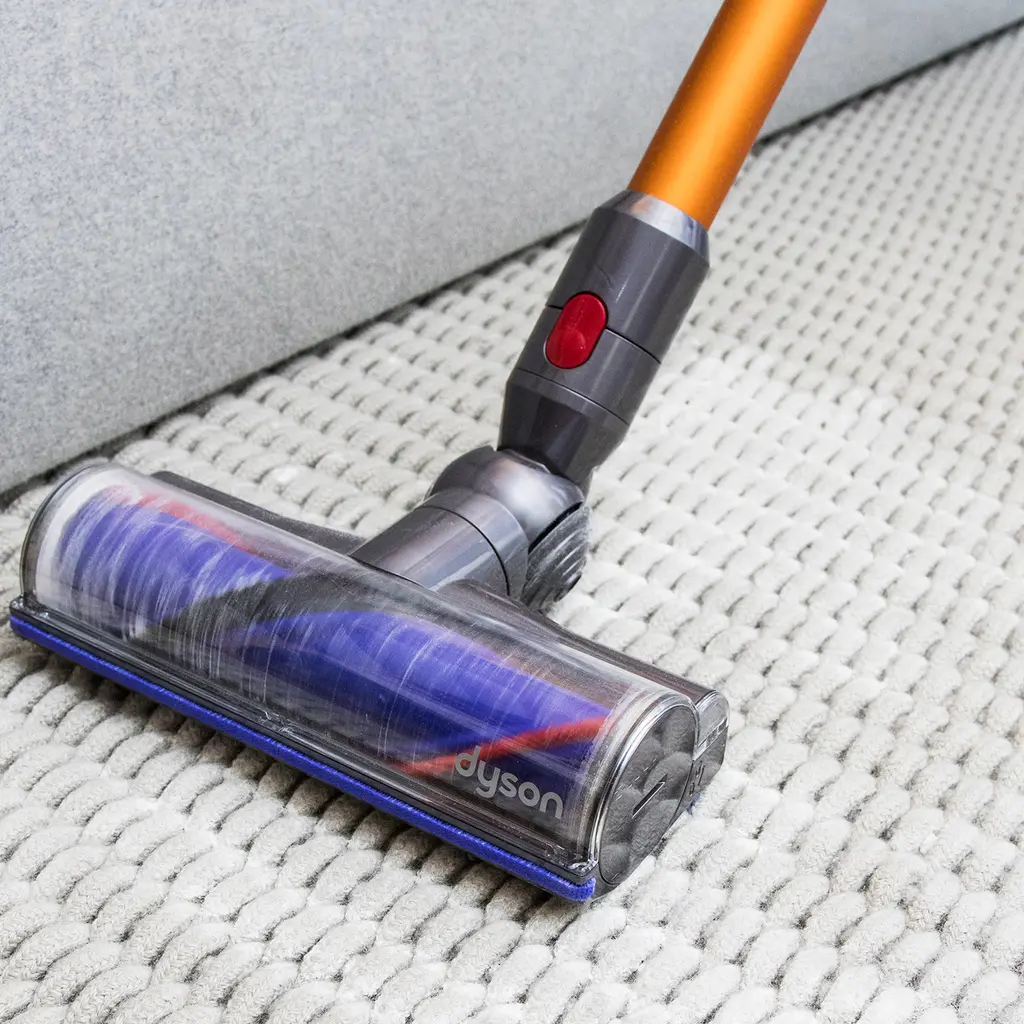
Tackling Motorized and Turbo Brushes (The Pet Hair Magnets)
These attachments, often called “powerheads” or “turbo tools,” have a spinning brush roll (beater bar) and are magnets for hair, string, and carpet fibers. They require a bit more attention.
- Remove the Brush Roll: Most motorized heads have a way to remove the brush roll. You might need to twist a lock, press a button, or unscrew a side panel (a coin often works perfectly for this). Consult your vacuum’s manual if you’re unsure.
- The Great Untangling: This is the most satisfying part. Use a pair of scissors or a seam ripper to carefully cut through all the tightly wound hair and string. Be careful not to cut the bristles themselves. Once cut, the hair should pull away easily.
- Clean the Housing: With the brush roll removed, you have clear access to the inside of the attachment head. Use a damp microfiber cloth to wipe down the interior housing. Use a toothbrush to get into any tight spots where dust has accumulated.
- Wash the Brush Roll (If Permissible): Check your manual. Some brush rolls can be washed, while others cannot, especially if they have integrated bearings that could rust. If it’s just plastic and bristles, you can wash it with warm, soapy water, just like the basic attachments.
- Dry and Reassemble: Again, ensure the brush roll is completely bone-dry before reinserting it into the powerhead. Once dry, pop it back in, secure the lock or panel, and give it a test spin with your hand to make sure it moves freely.
“We design vacuums for maximum airflow, but the system is only as strong as its weakest link. In 90% of suction-loss cases that aren’t filter-related, the culprit is a blockage in an attachment. A five-minute clean can restore a vacuum’s performance to nearly factory-new conditions.”
— David Chen, Lead Product Engineer at VacuTech Dynamics
|
Our Picks for the Best Vacuum Cleaner in 2026
As an Amazon Associate, we earn from qualifying purchases.
|
||
| Num | Product | Action |
|---|---|---|
| 1 | LEVOIT Cordless Vacuum Cleaner, Stick Vac with Tangle-Resistant Design, Up to 50 Minutes, Powerful Suction, Rechargeable, Lightweight, and Versatile for Carpet, Hard Floor, Pet Hair, LVAC-200 |

|
| 2 | BLACK+DECKER dustbuster AdvancedClean Cordless Handheld Vacuum, Compact Home and Car Vacuum with Crevice Tool (CHV1410L) |
|
| 3 | Shark HV322 Rocket Deluxe Pro Corded Stick Vacuum with LED Headlights, XL Dust Cup, Lightweight, Perfect for Pet Hair Pickup, Converts to a Hand Vacuum, with Pet Attachments, Bordeaux/Silver |
|
| 4 | Shark | Upright Vacuum Cleaner | Navigator Lift-Away | Swivel Steering | HEPA Filter | Vacuum for Pet Hair | Crevice Tool & Dusting Brush Included | For Carpets & Hard Floors | White/Silver | NV356E |
|
| 5 | BISSELL CleanView Compact Turbo Upright Vacuum with Quick Release Wand, Full Size Power, Compact Size for Apartments & Dorms, 3437F |
|
| 6 | BISSELL CleanView Compact Upright Vacuum, Fits in Dorm Rooms & Apartments, Lightweight with Powerful Suction and Removable Extension Wand, 3508 |
|
| 7 | Shark | Pet Cordless Vacuum Cleaner | LED Headlights | Removable Handheld Vacuum for Pet Hair | Crevice Tool & Pet Multi-Tool Included | 40min Runtime | For Carpet & Hard Floors | Grey | IX141 |
|
| 8 | Shark NV352 Navigator Lift Away Upright Vacuum, Hepa Filter, Anti-Allergen Technology, Swivel Steering, Ideal for Carpet, Stairs, & Bare Floors, with Wide Upholstery & Crevice Tools, Lavender |
|
| 9 | Amazon Basics Upright Bagless Vacuum Cleaner for Carpet and Hard Floors, With Crevice and Upholstery Tools, Detachable Handle, Lightweight (8.4 lbs), 1.7L Dust Cup, 720W, 25ft Cord, Black/White |
|
| 10 | BLACK+DECKER dustbuster QuickClean Cordless Handheld Vacuum, Car Vacuum Portable (HNVC215B10) |
|
How Often Should You Clean Your Vacuum Attachments?
This really depends on your usage. As a general rule, a visual inspection once a month is a good idea. For a deeper clean, aim for once every 3 to 6 months. However, if you have pets or long-haired family members, you’ll likely need to detangle your motorized brush every few weeks.
Troubleshooting Common Attachment Problems
- A Persistent Musty Smell: If your attachments still smell funky after washing, it might be due to bacteria. Try soaking them in a solution of one part white vinegar to one part warm water for about 30 minutes before washing with soap. The vinegar is excellent at neutralizing odors.
- A Stubborn Clog: If you suspect a clog you can’t see, try using a straightened wire coat hanger (be gentle to avoid puncturing the plastic) or a plumber’s snake to carefully push the debris through.
Frequently Asked Questions (FAQ)
Can I put my vacuum cleaner attachments in the dishwasher?
While tempting, it’s generally not recommended. The high heat and harsh detergents in a dishwasher can warp the plastic and degrade the bristles over time. Hand-washing is always the safer and more effective option.
What’s the best way to clean the soft bristles of a dusting brush without damaging them?
The best method is to use another vacuum’s hose to suck the dust directly off the bristles. If washing is necessary, use lukewarm water and a very gentle soap, and avoid aggressive scrubbing. Reshape the bristles with your fingers before letting them air dry.
My turbo brush isn’t spinning anymore. What should I do?
First, check for tangles. This is the most common reason for a stuck brush. If it’s completely clear of hair and debris, check the small air turbine that powers it. It might be clogged with fine dust. A blast of compressed air can often clear it out.
How do I know when my attachments are completely dry?
Give them a full 24 hours in a well-ventilated area. Before reattaching, shake them vigorously. If you see or feel any water, give them more time. Using a damp attachment can lead to mold inside your vacuum or damage the motor.
Is it necessary to clean the inside of the vacuum wands and extension tubes?
Absolutely. While they don’t get as dirty as the heads, they can still harbor dust buildup and even clogs. Once a year, it’s a good idea to wipe them down on the outside and use a long, flexible brush (like a bottle brush) to clean the inside.
A Cleaner Home Starts with Cleaner Tools
In the end, taking the time for this simple maintenance task pays huge dividends. You’ll be rewarded with a vacuum that performs like new, a healthier living environment, and the satisfaction of knowing you’re getting the most out of your investment. So next time you finish vacuuming, take an extra five minutes to check on your attachments. It’s a small step that makes a massive difference. Now that you know how to clean vacuum cleaner attachments, you can ensure every nook and cranny of your home gets the deep clean it deserves.